Chain slack is like thin ice. Too much of it, the chain is too loose. Too less of it, the chain is too tight.
And both the loose chain and the tight chain are bad news for motorcycle riding. You need to adjust the chain asap.
With that in mind, in this post, we are going to cover:
How to check and measure chain slack
Recommended slack on a motorcycle chain
Let’s dive right in.
How to measure motorcycle chain slack?
Here are the steps to check and measure the motorcycle chain slack:
Time needed: 10 minutes
Tools required: Hand gloves, ruler
- Park the motorcycle on the center stand
Take the motorcycle on a level surface. Preferably in your garage or outside where the ground is leveled. Park the bike on the center stand.
- Shift the gear transmission to neutral
If the motorcycle is not in neutral already, then shift down to the neutral gear.
- Locate the lower chain’s midway
Consider the chain drive as two halves between the two sprockets – the upper half and the lower half. Locate the midway (approximately) point on the lower chain half.

- Move the lower chain vertically upwards
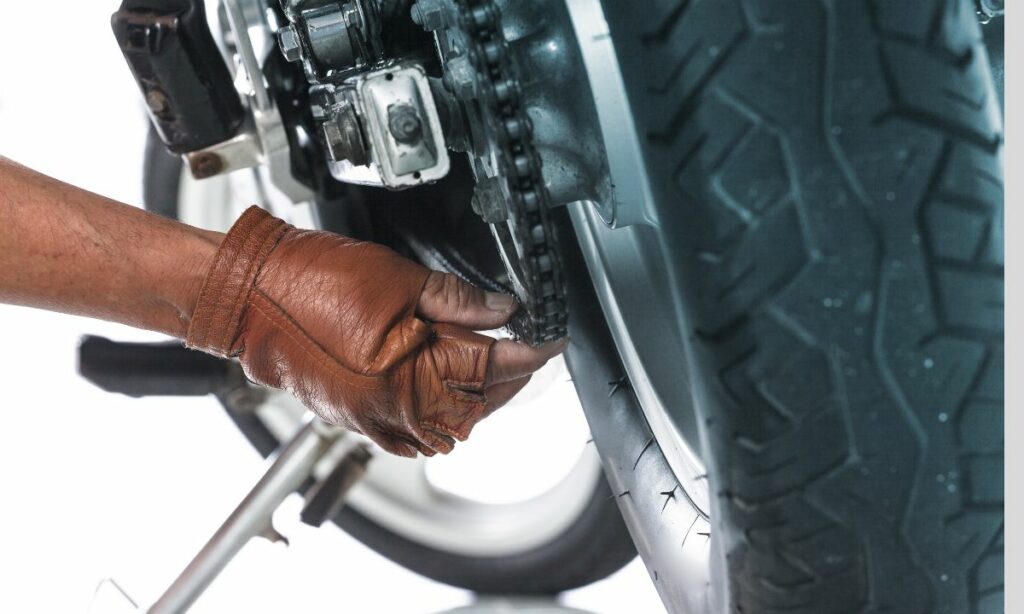
Place your hand on the located midway of the lower chain. Now, move the chain upwards using your hand. Move till the chain can no longer move up.

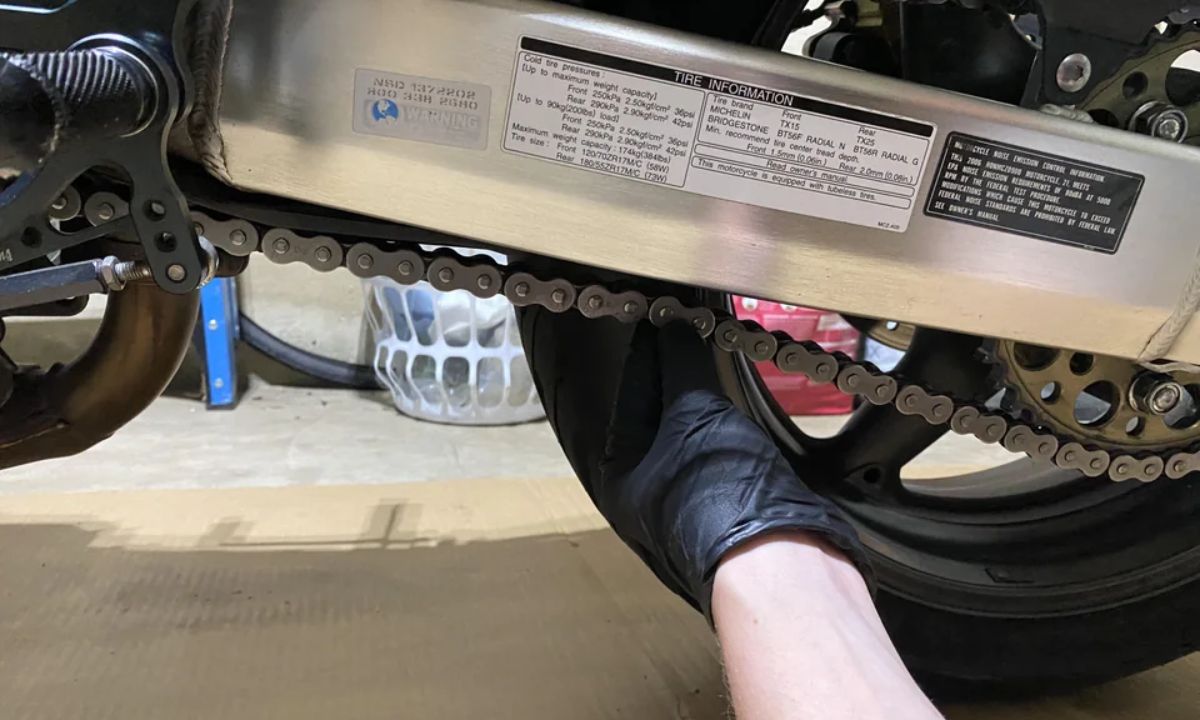
- Use the ruler to measure the chain slack
We now have the lower chain at its topmost point. Use the ruler to measure the distance between the top point from its original position. You can leave the chain, place the ruler, and then move the chain upwards for easier measurement.
- Take 3-5 readings for better chain slack measurement
Repeat the above step 3-5 times on the same point. The ruler readings should be the same (or around the same). The average figure will give the chain slack in your motorcycle.


How much slack should be in the motorcycle chain?
Now that we know the slack on the motorcycle chain, we want to adjust it to the right amount. If not there will be lots of problems starting with metal noise.
But, what is the right amount of chain slack?
There are different methods to look for the recommended chain slack for a motorcycle. Let’s look at each of them.
First method: Check the chain cover label
Many motorcycle models have the required chain slack labeled on the chain cover.
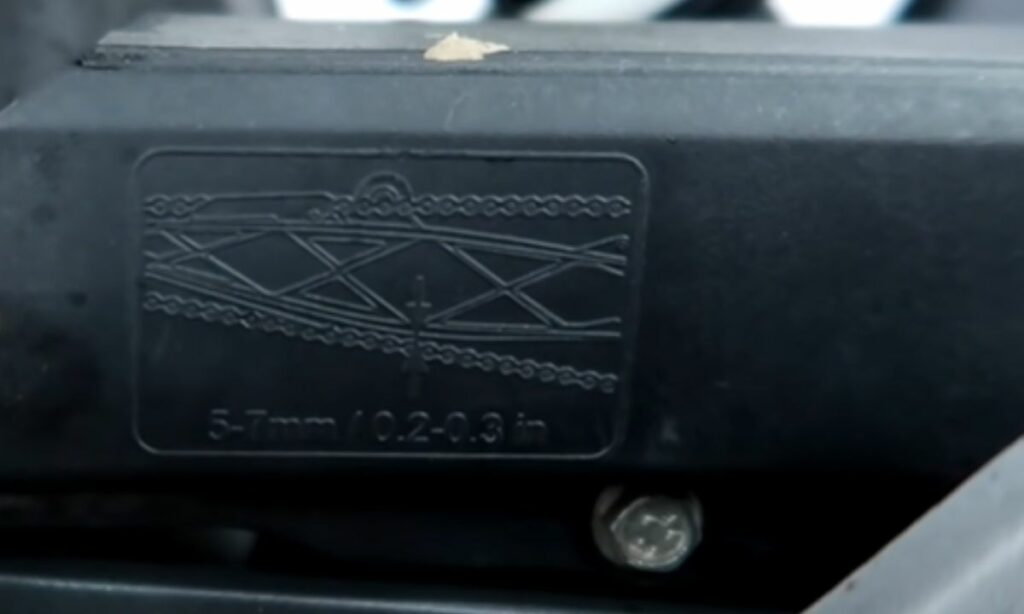
So, just check for the label. If it’s there, it’s far too easy to get the required slack for your motorcycle chain.
But, not all motorcycle models have the slack requirements labeled. Which brings us to our next approach.
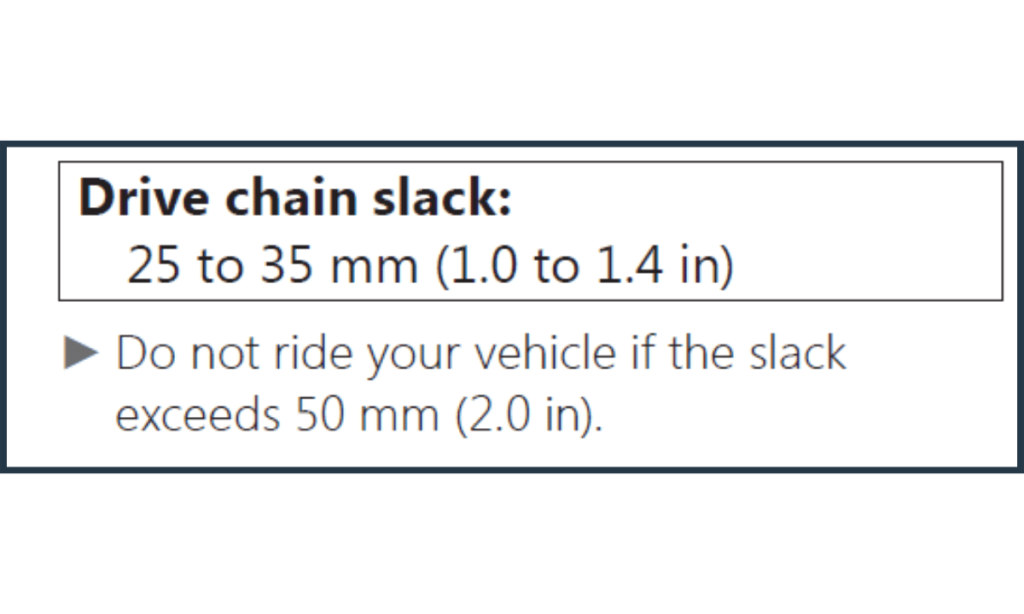
Second method: Refer the owner’s manual
All motorcycle owner manuals have the required chain slack explicitly mentioned in them.
If you don’t have the manual readily available to you, you can check online to get it easily.
The required slack for your motorcycle chain would be mentioned something like this:
Now, what if you can’t get your bike’s owner manual as well? There is one last option.
Third and last method: Use a thumb rule
A chain slack of 0.8 to 1.2 inches (20 to 30 mm) is often used as the thumb rule in motorcycles.
Again, this is a thumb rule. Go for it as a last resort.
Different motorcycle models have different recommended chain slacks. So a blanket thumb rule of 0.8 to 1.2 inches does not do justice.
I have seen motorcycles with recommended chain slack as low as 0.3 inches.
Only when the above two methods are not possible should you take up this slack thumb rule.
How to adjust the motorcycle chain
We now know the chain slack on the motorcycle and the required slack we should achieve.
How do we proceed next?
We need to adjust the chain slack to the required slack measurements. Since the chain gets loosened due to various reasons, most times you have a loose chain to adjust.
So, here is the detailed step-by-step guide to adjusting the motorcycle chain slack:
Step 1: Park the motorcycle on center stand
Take the motorcycle on a level surface, preferably in your garage or outside where the ground is leveled. Park the bike on the center stand.
Parking on the side stand is bad because 1) it’s not the best practice and 2) we need proper wheel alignment which is difficult on side stand.
So park your bike on the center stand.
Step 2: Shift the gear transmission to neutral
If the motorcycle is not in neutral already, then shift down to the neutral gear.
Neutral gear frees up the rear wheel to rotate freely. Plus, again, it is a best practice to shift the gear transmission to neutral. Not just for chain adjustment but for any maintenance and repair work.
Step 3: Measure the chain slack
The first main step is to measure the chain slack on your motorcycle.

The detailed steps are discussed in the above section. So we won’t do that again. But here is the gist:
Take a ruler and place it vertically at the point midway of the lower chain. Then use your other hand to move the chain upward. Measure the free vertical movement to which the chain can move.
That gives us the slack.
Step 4: Determine the required slack
Again, the required chain slack can be obtained from one of the three methods mentioned above.
Put simply, this is the pecking order:
- Chain cover label with the slack requirements mentioned
- Motorcycle owner manual
- Using a thumb rule of 0.8 to 1.2 inches (20 to 30 mm)
Start with the chain cover label. If not, go for the owner’s manual. The thumb rule is a last resort.
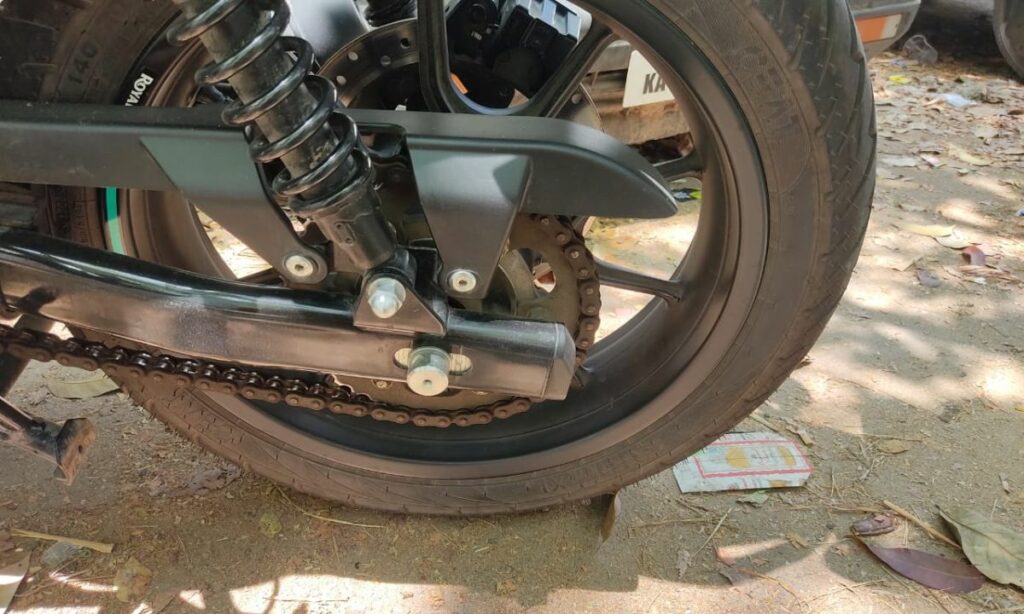
Step 5: Loosen the axle bolts (both sides)
Now, time to get our hands dirty and adjust the chain.
Start with the axle bolts.
The rear wheel has axle bolts on either side. So we need to loosen both of these.
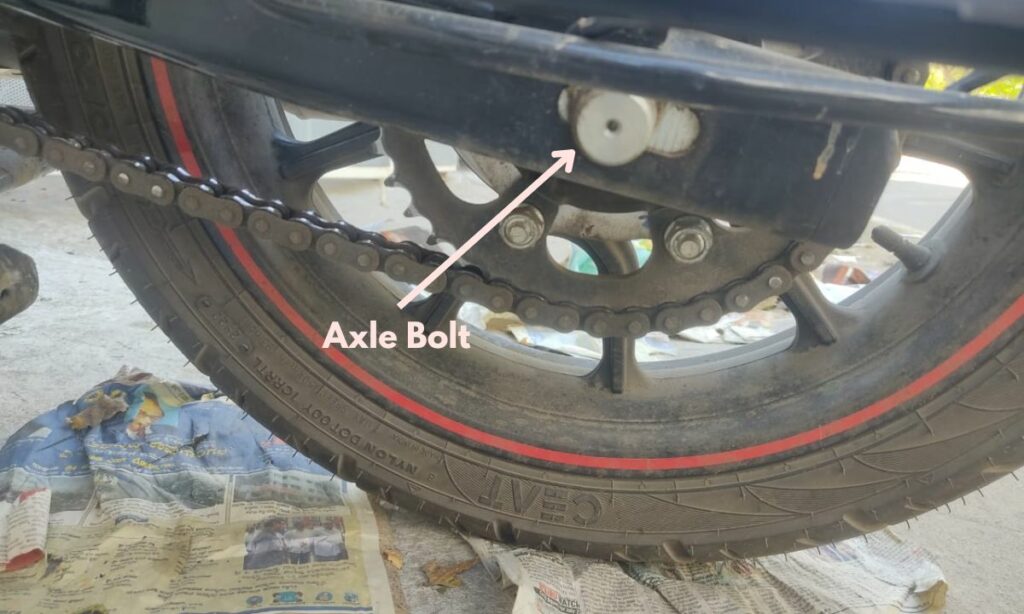
For easier reference, here is what we call these two axle bolts further in this post:
- Axle bolt on the chain side (bolt on the left side of the rear wheel)
- Axle bolt on the brake side (bolt on the right side of the rear wheel)
Crack the axle bolts loose. Don’t take it off. Just loosen it. Of course, you need to use a wrench.
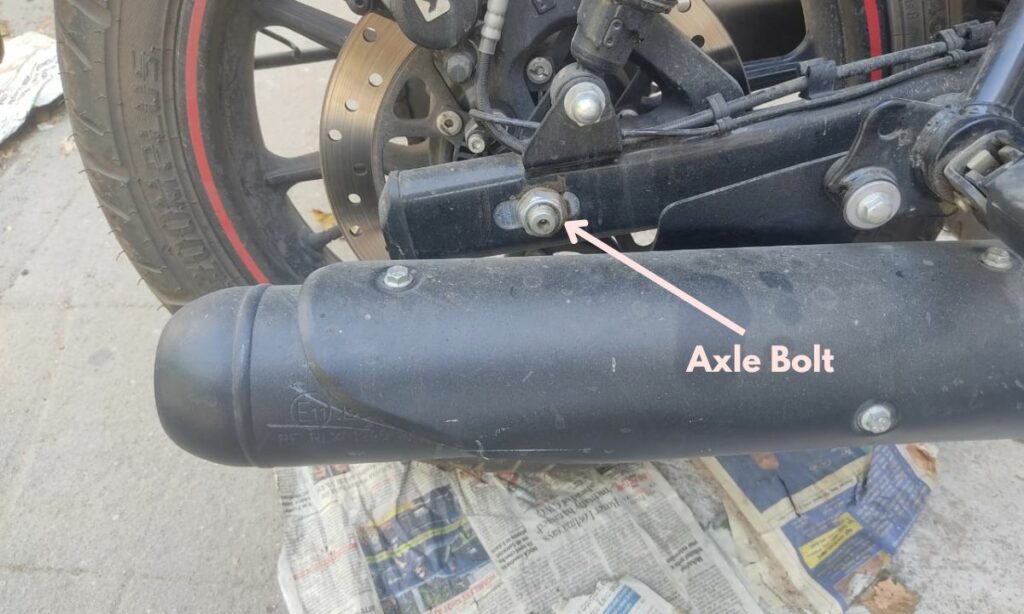
Note: Loosen both axle bolts. You can do it with just one (the chain side one) and later work on the other axle bolt (the muffler side one). But the best practice is to loosen them both before going forward with adjuster bolts.
Step 6: Turn the adjuster bolt to tighten/loosen the chain
Next step. Turn the adjuster bolts.
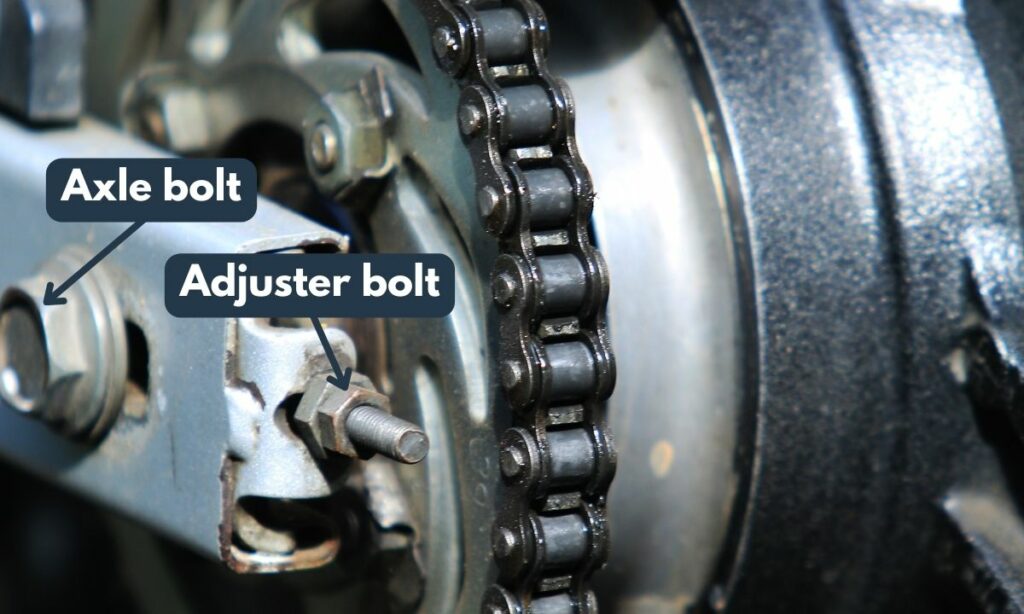
You can do it two ways.
First way: turn both the adjuster bolts in equal amounts. This keeps the rear wheel alignment in check.
But. This is tedious. I would go for the second way. Which is?
Second way: turn the adjuster bolt on the chain side. And postpone turning the adjuster bolt on the other side of the rear wheel for later.
Now, turning the adjuster bolt, use a suitable wrench.
Turn the bolt counter-clockwise to tighten the chain, and clockwise to provide the chain more slack.
How much to turn?
Go for a quarter-inch (1/4″) turn. And with each turn, go back to measuring the chain slack.
Step 7: Trial and error till the chain has the required slack
Repeat step 6 till the chain slack equals the recommended slack measurement.
So, every time you turn the adjuster bolt – measure the chain slack. Then go back to adjusting the bolt again. And come back to measure the slack again.
It will take a few tries till you get the desired chain slack.
Step 8: Lock the first axle bolt
Now that we have the required chain slack, it’s time to wrap up and put things back in their places.
But, it’s not as straightforward as you think.
First, lock the axle bolt on the chain side. The same side where you have turned the adjuster bolt for tightening/loosening the chain.
This is important. You must lock the axle bolt of the same side as the adjuster bolt you have used so far.
Once you have locked the first axle bolt, now comes the difficult part.
Step 9: Lock the other axle bolt in the same position
You can’t just lock the other axle bolt on the other side of the rear wheel.
Both axle bolts must be tightened to the wheel at the same position.
Why is that?
For wheel alignment.
If the axle bolts on either side have different positions, the wheel alignment is going to get disturbed. The wheel will have a slight tilt. Which is bad.
That’s why the other axle bolt must be turned to the same position as the first axle bolt you have locked.
How to do that?
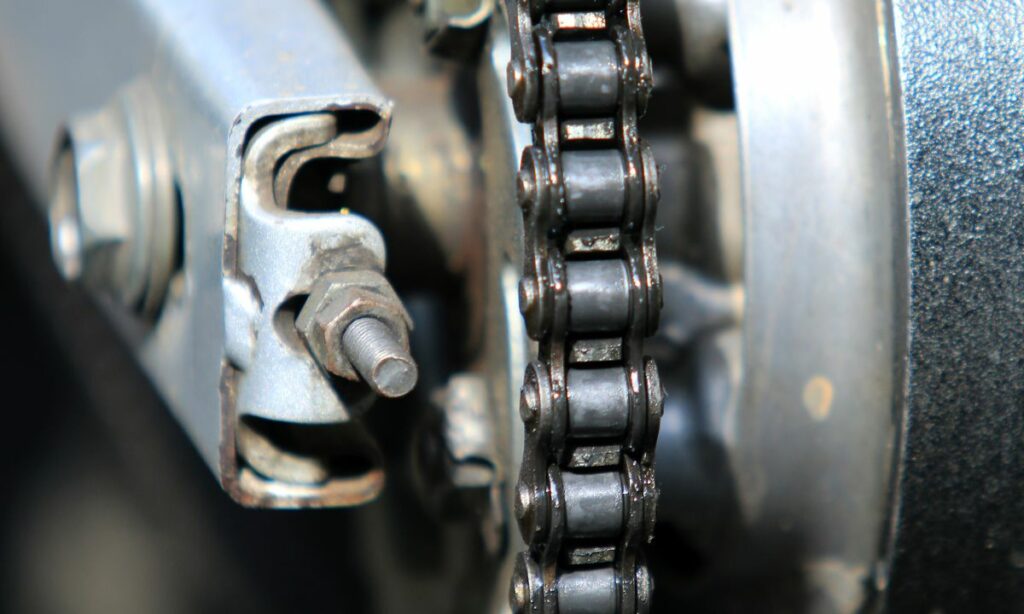
Notice the markers and indicators provided above or around the axle bolts. These markers come in different shapes and forms in different motorcycle models.
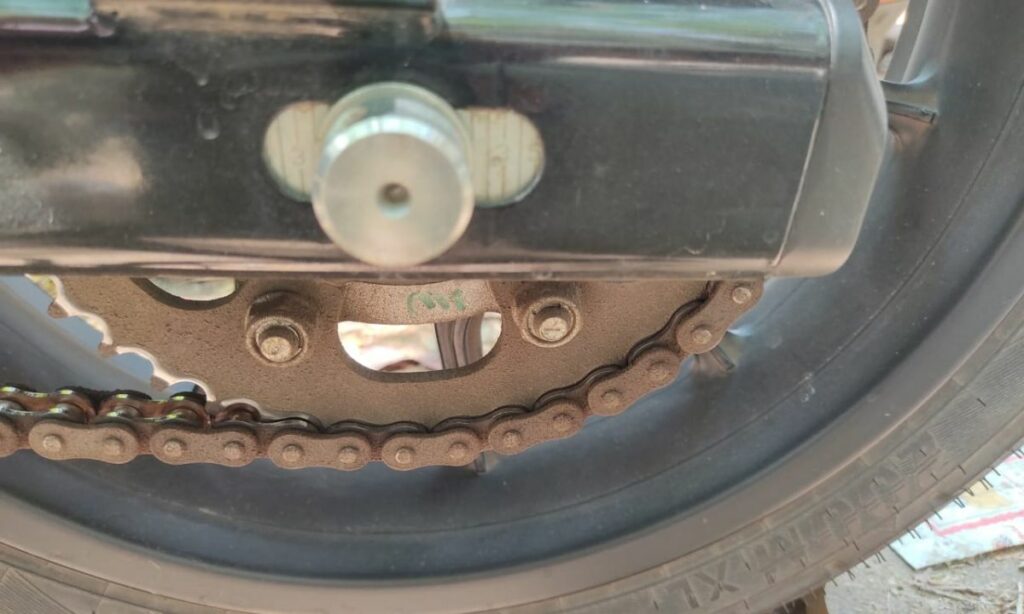
Here is an axle bolt with straight markings:
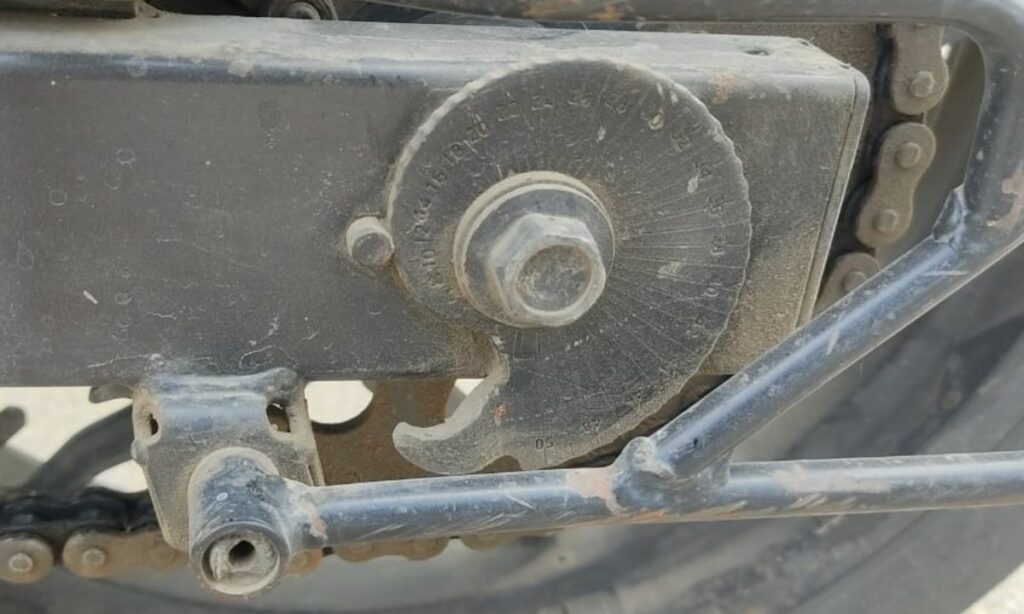
Here is the axle bolt with circular markings:
No matter the type of markings, the point remains the same.
Note down the chain side axle bolt’s position on the marker.
Next, turn the other axle bolt (on the brake side) until it reaches the same position on its marker.
Both the axle bolts are in the same position and the wheel is aligned now.
Tighten the other axle bolt (on the brake side).
And voila, your motorcycle chain is finally adjusted and has the right amount of slack.
FAQs
You should NOT ride with a loose chain. The chain can come off the sprocket and can cause riding problems. At worst, the motorcycle might fall off due to the loose chain skipping over the sprocket.
Riding with a loose chain leads to chain teeth skipping over the sprockets, uneven power transmission, jerky wheel movements, chain lash and noise, and in the final case – the chain coming off the sprocket.
Both too tight or too loose a motorcycle chain are bad for a motorcycle. The motorcycle chain should have an optimum chain slack as recommended by the manufacturer.
You should check the chain slack often. If the chain hangs low or has too much slack it is loosened. Other symptoms include – uneven power transmission and jerky wheel movements.